Chinese Almond Cookies Recipe

Good Day Homemakers! Today I am going to share a recipe for Chinese Almond Cookies.

Made in the traditional manner, with lard….mmm….yummy…lard. Haha…No really the cookies are delicious! I do not do a lot of cooking with lard but to get the right texture with this traditional Asian dessert only the real thing would do! (trust me, I tried making tortillas with crisco once, and I ended up with some very pie like tortillas for dinner). Sometimes you just need the right ingredient!

This cookie is deliciously almond-y with a nice crumbly texture. The recipe calls for an almond on top but I unfortunately only had pecans 😦 Hey! a nuts a nut!

Enough of my chatter….here’s the recipe 🙂

Chinese Almond Cookies Recipe

Ingredients:

  • 2 1/2 cups flour sifted
  • 1 tsp baking powder
  • 1/2 teaspoon sea salt (salt)
  • 1 cup lard
  • 1 cup raw sugar (sugar)
  • 1 egg
  • 1 tsp almond extract
  • 1 egg yolk
  • 1 tbsp water
  • blanched almonds

1. Preheat oven to 350 degrees F.

2. Sift Flour, Baking Powder, and Salt. Set aside.

Sift Dry Ingredients

 3. Cream together Lard and Sugar. Beat in Egg and Almond Extract.

Cream Lard and Sugar

4. Add flour a little at a time beating on low until all ingredients are combined.

Cookie Dough

5. Scrape dough out onto a flour surface and knead slightly. Add more flour if dough is too wet or add a little water if dough is too dry.

6. Form dough into a log. Either cut or rip dough off in 1inch pieces.

Knead Dough

7. Roll pieces into balls and place on greased cookie sheet. Place an almond in the center and press down.

8.Beat together egg yolk and water. Brush the top of cookies with egg yolk mixture and bake.

Push Nut into Top

9. Bake for 13-15 minutes. Allow to cool on cookie sheet for about five minutes, then transfer to a cooling rack.

10. Eat and Enjoy!

These Chinese Almond Cookies taste amazing first thing out of the oven but the texture really comes out when they are entirely cooled.

Yummy!

Happy Baking

♥♥♥

Samantha

Vanilla Peanut Butter Cookies

One Pin At a Time

I do not think I have shared with you my love, wait, scratch that, my obsession with Pinterest…have I? Well, I am addicted! I just downloaded the app onto my iPad and things have gotten much worse.

I pin all kinds of recipes, craft projects, diy projects, ideas, and much more. However, I never do anything with these pins. So I have decided to start posting  my findings from pinterest….One Pin At a Time.

My first post is from my Food, Need I say more? board. It is a Recipe for Vanilla Peanut Butter Cookies, which were very like chocolate chip with a little more vanilla flavor.

 Mine did not turn out as chewy looking because the recipe called for crisco and all I had was butter 😦 They were still a big hit and I recommend them greatly!

For your enjoyment, here is the recipe:

Vanilla Peanut Butter Cookies

Ingredients:

  • 1/2 cup butter
  • 1/2 cup white sugar
  • 1/4 cup light brown sugar, packed
  • 1 large egg
  • 1 tablespoon water
  • 2 teaspoons vanilla extract
  • 1/4 teaspoon cinnamon
  • pinch sea salt
  • 1/2 teaspoon baking soda
  • 1 1/2 cups all-purpose flour
  • 3/4 cup peanut butter chips

Instructions:

  1. Preheat oven to 375F. Prepare 2 cookie sheets
  2. Mix together with a whisk, the cinnamon, salt, baking soda, and flour. Set aside.
  3. In a large mixing bowl, beat together butter and sugars until light and fluffy (3-5 min). Add egg and beat. Add vanilla and water and beat until creamy.
  4. Combine Dry ingredients with wet, beat on low-speed.
  5. Fold peanut butter chips in with a wooden spoon.
  6. Chill dough in the refrigerator for 30 min. up to overnight.
  7. scoop on to cookie sheets with a spoon or small cookie scoop.
  8. Bake in preheated oven for 8-10 min. Remove cookie sheets and let cookies sit for 5 minutes before transferring to a cooling rack.
  9. Eat and Enjoy!!

Happy Baking

♥♥♥

Samantha

Shelling Your Own Nuts

If shelling your own nuts isn’t homesteading it, I don’t know what is!

These pecans were given to me compliments of Grammy ♥

Sarah deserves the credit for this post however…This was originally going to be her post…She shelled these for an entire afternoon (with help from the kids). I think we came up with enough for at least one Pecan Pie this Thanksgiving!

Well that’s all.

Happy Shelling

♥♥♥

Samantha

Neighborhood Bounty

There are some things I absolutely love about my neighborhood, one of them being the park along the river and another being the amount of food growing as part of everyone’s landscapes!

We have plum trees, apple trees, orange trees, walnut trees, black walnut trees, cherry trees, mulberry trees, pomegranate trees, blackberry bushes, and countless herbs. I’m sure there is much more that I have yet to see 🙂

My goal is to befriend as many neighbors as possible not only to reap the rewards of their bounty but also to make new friends and possible raise my children in a way that seems a little uncommon these days.

Do you remember? The days when the entire neighborhood knew who you were and you ran through everyone’s backyard picking flowers and fruit?….

Well anyway, I thought I might share some photos of what we have acquired so far this summer 🙂

Figs

Yum! Ok, so we didn’t actually pick these but they were given to us from a co-worker of mine who grows them in her backyard

I have not had much experience with figs…so I was at a loss as what to do with them. I ended up finding a recipe online for honeyed figs with icecream..OMG! It was good…I served them along side my homemade Vanilla Bean Icecream…Recipes to follow at a later date 🙂

Blackberries

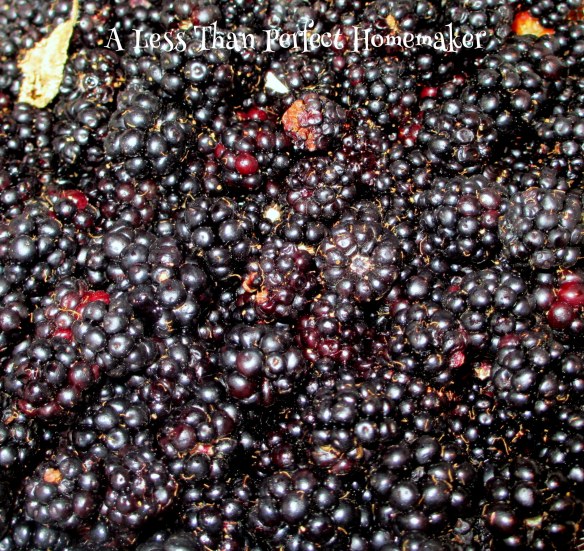
The little ladies and I scrounged pretty hard for these yummy little guys which I will post about later this week.

Hopefully we can get out for the next round and end up with enough to make some jam!

Apples

And my first venture out to meet the neighbors! These apples were picked from a nice retired couples yard..I found out that they have only lived in the area for about a year, their daughter lives close by, and they have grand kids 🙂 The women offered for me to continue picking from her apple trees, pomegranate trees, and orange tree as long as I bring my children by to meet her!

What to make with these??….apples slices? applesauce? apple pie filling?….or just eat them 🙂

Plums

These little guys are actually growing on an easement so the property doesn’t belong to anyone…they were just hanging out waiting for someone to notice them.

What to do with these?….I think we will just enjoy eating them..

Thanks for looking 🙂

Happy Picking

♥♥♥

Samantha

Homemade Strawberry Rhubarb Pie

I recently tried my hand at a Strawberry Rhubarb Pie and the results were AMAZING! Now I don’t mean to toot my own horn but I’m telling you the pie was soooooooo good! It was my first ever and I do believe it will now become a regular in my rotation 😉 I have already expressed my love of strawberries in an earlier post on Angel Food Cake Strawberry Shortcake so I really do not need too many reasons to add another strawberry dessert into my repertoire.

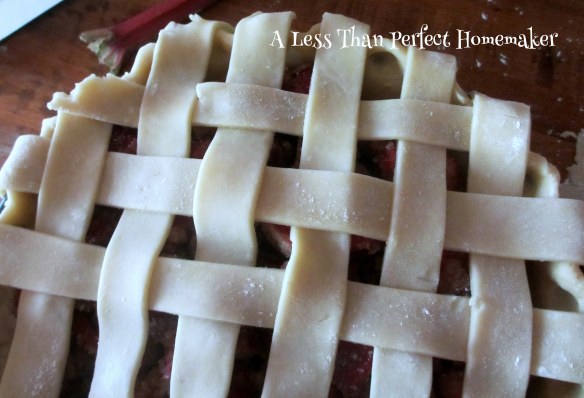
Not only was this pie a first for me but so was preparing a lattice top crust. It was a lot more simple to make than I had ever imagined and you can view the tutorial here: Lattice Top Crust Tutorial.

Isn’t it always so exciting to learn something new?

Well enough of my chatter, here is the recipe:

[gmc_recipe 967]

Happy Baking

♥♥♥

Samantha

Woven Lattice Top Crust Tutorial

With berry season coming to its height I do believe a lattice top crust tutorial is in need. Um.. with all the berry pie recipes out there and all.

Yum….Berry Pies!

Preparing a Woven Lattice Top Crust

Roll your bottom crust out and place in pie pan. I used The Deluxe Butter Crust Recipe in this tutorial. Fill with fruit filling of choice…For this tutorial I used a Strawberry Rhubarb Filling. Brush the outside edge with cold water:

Next roll your top crust out into a 13 1/2″ round. Cut the dough into 18 strips (or less if you prefer larger strips):

Place half of the strips an equal distance apart on top of the pie:

Fold every other strip halfway back over itself, making the ends meet:

Place 1 strip crosswise just beyond the folded edge, across the center of the pie:

Unfold the strips to their original position over the crosswise strip:

Now fold back the opposite strips (the ones you left flat the first time around). Place another strip crosswise just beyond the fold:

Unfold these strips over the crosswise strip the same as the first time:

Repeat this process until you reach the edge of the pie:

Follow the same steps to finish the second half of the pie:

When you have finished placing all you lattice strips you are going to fold the extra dough over the bottom crust edge and pinch the outer crust together to form a scallop edge:

Bake your pie according to the recipes direction. When your finished you should have a beautiful lattice pie crust and everyone will oohhh and awwww over it!

Happy Baking

♥♥♥

Samantha

New Job!

Status

Well I did it.

I went back to work today after almost five years! I was really nervous and I don’t know why. Its like riding a bicycle…You just don’t forget how.

Anyway. I’m excited about this new addition to my life. It will bring me some much needed confidence and my children and husband some much needed space 😉

I will still be trying to bring you fun posts on my happenings at home…and adding new items to my shop……Until next time.

Have a happy day!

♥♥♥

Samantha

To Post or Not To Post That Is The Question

Status

I’m feeling so sleepy an uninspired today 😦

I have been trying desperately to put myself on a schedule…a schedule to post, a schedule to craft, a schedule to workout…The list goes on and on. I can’t seem to get it! Oh well, such is life. Wish me good luck…I think I could use it.

I have nothing of importance to post today so I will share a fun picture of my daughter helping her daddy cook dinner 🙂

Have a happy day!

♥♥♥

Samantha

Fancy Napkins with Mitered Corners (working my way through Stitch by Stitch)

First Project in Stitch by Stitch

The much awaited moment has arrived! I have finally begun my journey through the book Stitch by Stitch! If you remember from an earlier post Working My Way Through Stitch by Stitch, I have been planning to work through my learn to sew books one project at a time….as they were intended of course!

The first project in the book was to make bias tape (I skipped over this because I have already had much practice and did not want to waste that much fabric on something I suck at using :P)…so I moved on to making Fancy Napkins with Mitered Corners!

Fancy Napkins with Mitered Corners

Finding The Grain Line

The first thing I learned to do was locate the grainline. This was done by clipping the edge along the selvage, then proceeding to rip up the entire length of my fabric. Finding the grainline ensures that your fabric always lays smooth and straight even after washing, and washing, and washing!

A pretty fabric I had left over from another project.
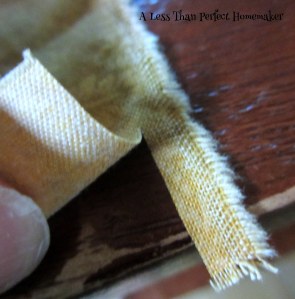
Clipping the selvage edge.

Marking and Cutting The Pieces

After I located the grainline and straightened out my fabric I was ready to cut my napkins out. The napkins I made here were cut at 19″x19″. I used a clear ruler and white chalk to mark them off and then used my rotary cutter (I can hardly cut a straight line with out it).

Cutting my pieces.

All four of my napkins cut out.

Finishing The Unfinished Edge

Next I had to use a zigzag stitch to create an overlocking stitch to keep my edges from fraying. If you happen to own a serger this would be a good time to use it. To create an overlocking stitch I set my machine at the largest zigzag and stitch possible. Then I lined the edge of my fabric up with the very center of the pressure foot. This caused the zigzag stitch to go one stitch on the fabric, one stitch off the fabric, creating a casing for my unfinished edge.

The front of my overlock stitch.

The top view of my stitch

And the backside. When sewing an overlocking stitch the edge is likely to roll..just press it out when your done. When coming to a corner, stop stitching, leave the needle in and raise your pressure foot, pivot the napkin to the next side and lower your foot. Continue sewing.

Mitering The Corners

At this point  I could have been done with my napkins…but how fun is that? So I decided to continue on with the next step which was mitering the corners. I started by pressing each corner in about 3/4″. Then I pressed each side over until they meet up with the tip of the folded corner.

Fold each corner 3/4″ up and press.

After pressing the corners, fold over the edges to meet the point of your corner.

You now have mitered corners! pin the corner down before you sew the hem.

Sew your hem just above the zigzag stitch.

Varsity Mitered Corners

Now, I also could have been done at this point and I would have myself some very practical napkins indeed! But what if I wanted to make them just a little bit more fancy? I decided to go onto the last step and do a Varsity Mitered Corner. If only doing this style of mitered corners you can skip the overlocking stitch step because the unfinished edges will be encased in the hem. I already overlock stitched all four of my napkins so what the heck?

Fold each edge over 1/4 in and press, then fold over each edge 1/4″ again and press. Then open the folds back up.

Next draw a diagonal line at the tip of the folded lines in each corner.
fold your napkin in half at the diagonal and meet up the corners. Pin.

Clip and turn the sewn corner under creating a finished hem in the process.

Pin your corners in place before sewing down your hem.

Handmade Fancy Dinner Napkins

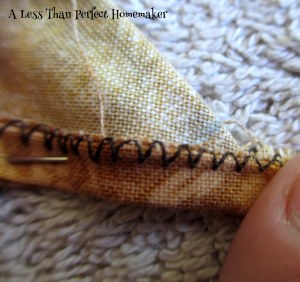
I decided to use a zigzag stitch to finish this hem off to give the napkin a nice look and it sort of raised the edge up a bit (which was accidental, but it looked kinda cool anyways) …

These napkins are a good reason to get my Brother tuned up… It has so many pretty stitches! The possibilities are endless! And wouldn’t these make wonderful gifts?

There you have it! My first project from Stitch by Stitch! Stay tuned for the next one Picnic Place Mats with Bias-Bound Edges…Great! (I suck at bias tape)

Happy Sewing

♥♥♥

Samantha

Saturday Morning Pancakes

Dad’s Old Fashioned Whole Wheat Pancakes

It has become quite the tradition in our home to have Daddy make pancakes on Saturday morning. We found a recipe a while back and adapted it to meet our taste and health standards. What we came up with is a delicious and nutrition pancake recipe that has become a staple in our home.

This healthy whole wheat pancake recipe takes no time at all to prepare…exactly why my husband has no qualms with making it on Saturday morning. You could even keep the dry ingredients mixed in a jar and at ready!

So from my family to yours!

[gmc_recipe 895]

Happy Cooking

♥♥♥

Samantha