Easter Egg Dying

Homemade Easter Egg Dye

So Easter is in oh,  5 days? right?… I haven’t prepared, decorated, or planned a single thing. What is the matter with me?! Maybe I should take this year off?…or maybe I can scrounge up some yummy photos of the delicious Quiche I normally serve.

We usually put on a large brunch followed by an easter egg hunt in the backyard… *sigh* I use to have the prettiest back yard in the spring.  We usually top everything off with some of the first strawberries of the season. Fresh Strawberry Lemonade and Fresh Strawberry Pie… ~yum

I guess I am just not feeling as pumped as usual… Who would come to my Easter Brunch?…my little ladies I suppose. Ok, I guess I’ll stop feeling sorry for myself for a minute and share my post from last year.

We tried our hand at homemade Easter Egg Dye last year and I absolutely loved the results…hopefully I will have a chance to make it happen again before Sunday rolls around.

So if you missed it last year, you have another chance!

To view the full post and dye recipe click here!!!

Pretty!

 Yes, yes, I know this is a cop out post but It’s all the energy I have at the moment 😛

Happy Easter

Samantha

Fleece Knot Pet Bed

Easiest Pet Bed EVER!

Seriously. The easiest pet bed you could ever possibly make!

Since we moved, I downsized my dog Rikko’s crate for space. I didn’t have the bed for it anymore so poor Rikko has just been chillin on the plastic 😦 I don’t know that she minds but I was feeling bad about it……

So I made her one on the fly one evening while the girls were watching a movie. It’s so easy….It makes me want to make hundreds of them…and I have made a few 😉

Ok, if you for some reason were born without a heart and do not enjoy photos of adorable animals then maybe you might want to pass this one up. BUT! if you enjoy seeing photos of adorable animals and would like the know how on this easiest pet bed ever, then please read on!

Fleece Knot Pet Bed

That’s Rikko 🙂 My adorable yet somewhat “hyper” American Eskimo. She is super sweet, just filled with all sorts of angst 😛 She will be helping us through.

Hopefully you have some fleece just hanging around from another project like I did but if you do not then run to Joann’s right away..or drive… It’s up to you. You probably need about 3 yards, just in case. To measure your pieces just place your dogs crate right on top of a folded piece of fleece or measure out the size you want, adding about six inches all around for the knots.

If your dog is anything like mine…she just knows that something special is being made for her ♥ After you have your two pieces cut out, you need to cut uniform strips the entire way around. When you are done, all four corners will have squares on them…just cut those off.

This is Nixie 🙂 Our kitten, She assumes that since I moved the bed it now belongs to her and Rikko is such a sissy she will just pout about her lost bed…..

Why is that cat in my bed?

That’s my piece!

She is pretty sure this bed is for her….just like everything else in our home is.

Yeah….this is mine.

Rikko wasn’t sure if she could lay claim to the bed after Nixie relinquished it…haha.

Is it done yet?…how bout now?….and now?…..

Start knotting your strips. Use a double knot, making sure not to pull too tight. Keep in mind the direction you are tying your knots and go around the entire bed in the same direction…otherwise it will look lopsided 😦 Leave enough un-knotted at the end so you can stuff this thing with some stuffing!

Then take what ever stuffing you have on hand or bought just for this purpose and start stuffing away 🙂 As you put the stuffing in use your hand to mash it down and sort of spread it out for an even surface. After you have it filled enough, knot up the rest of your strips.

That is Fayette, my other cat, in the background 🙂

Stop for a minute and play fetch with your puppy ♥
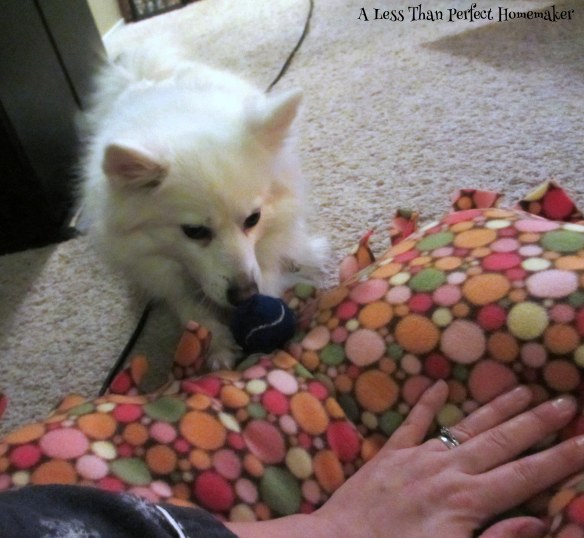
Mom…we should play on my new bed 🙂

Viola~ You have just  made a pet bed! My daughters actually have a couple of these as round floor pillows to fit inside their fantasy castles…They are so much fun to make! If you can believe it I actually bought a pattern for this bed…awhile back. Yes, I have little faith in my own ability sometimes..*sigh*

I’m soooo…..excited!

If you have any extra fleece you can make a cuddle pillow to go with it and a couple of rope toys 🙂

Yeah…it’s alright…

Then you might get some cuddles….maybe from the cat too, If she feels like it.

Thanks Mom!

That is all, I hope you enjoyed meeting my pets.

Happy Crafting

Samantha

Up-cycled Wool Sweater Turned Hobo Bag

One Pin At A Time

Well to make good on my promise of working through my projects and recipes from my Pinterest Boards I picked a crafty project from my board Crafty Ideas for this months One Pin At a Time. Turning an old wool sweater into a Hobo Bag, or in my case a shrunken sweater, not an old one. 🙂

Original Pin

Pretty self-explanatory, right?

I actually didn’t have any directions to read just the images to follow seeing as how the site was in a different language but honestly I usually only need the pictures and then I just kind of set forth on my path. I captured a few pictures so I tried to condense them for your viewing pleasure. Can’t have you getting bored now, can we?

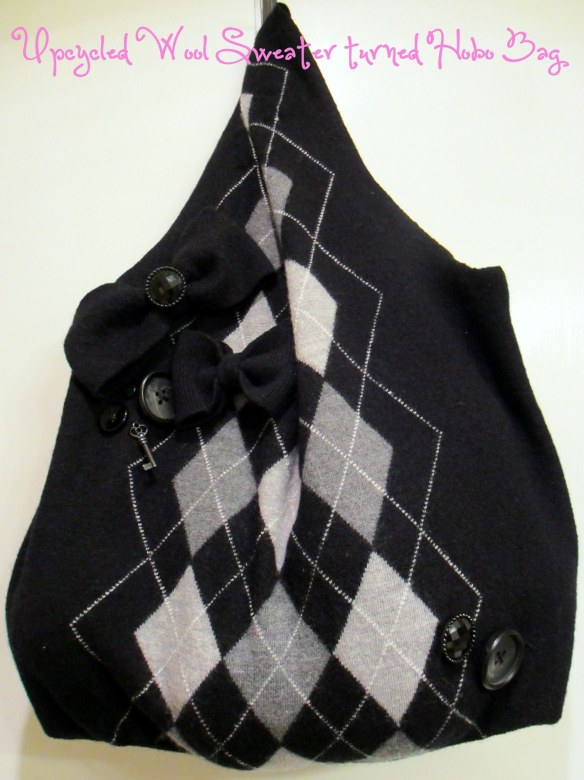
Up-Cycled Wool Sweater Turned Hobo Bag

I started out with a perfectly good men’s argyle wool sweater…only it was several times too small. First, I cut off the sleeves, folding the sweater in half to even up the two curves. Next, I measured out the length down the neck I wanted to cut. Once I cut out the neck, I rounded out the lines.

After I had my shape I turned the sweater inside out and sewed the bottom together. Then I squared the bottom. The original pin has you sewing on a bottom but my sweater was already so long I decided to make my life easy and drop that step 🙂

After I had the straps cut and the bottom squared I could have pretty much stopped, which is wear the pictorial ends in the pin, however, I  decided I would like to make my bag a little more functional. To do this I made an insert for the bottom to help hold its shape, I added a zippered pocket, and I reinforced the straps.

I used a very heavy weight interfacing and some key snuggle flannel to make the bottom insert. I just measured the squared bottom, added a half-inch all around, cut my snuggle flannel, sewed a pillowcase, and then inserted the interfacing.  You may put a few tacks in after positioning the bottom insert to keep it from shifting.

To reinforce the straps I just cut two strips of my snuggle flannel print per my measurements of the straps and pressed under the edges and proceeded to hand sew them to the underside of the sweater straps. I decided to hand sew them on because the wool sweater has such a high pile I thought the machine stitching on the outside might look too tight and out-of-place.

I made a floating zippered pocket and hand stitched this to the back of the inside of the purse. I only stitched the top and put tacks into the two bottom corners to make the stitches on the outside of the purse seem invisible. I will post a tutorial soon on creating a floating pocket 🙂

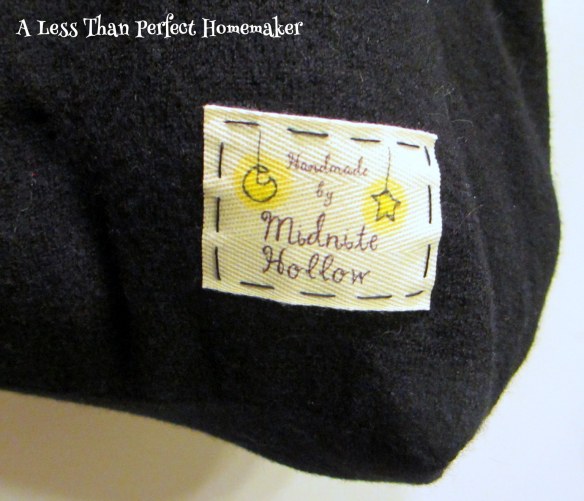
Last but certainly not least I adorned the purse with bows and buttons and one key charm ♥ To make the bows I just cut strips from a left over sleeve and made foax bows with the strips. My last step was to sew my shop’s label on the bottom right side of the back…Free advertising, yes please!

Overall….I now have a School Girl Chic-esc….Hobo Bag 🙂 Not a bad way to re-purpose an un-used sweater, huh?

Final Creation

Happy Sewing

Samantha

Homemade Play Dough Recipe

Fun For Rainy Days

With the weather being less than agreeable and the girls and I cooped up in our “cozy” apartment we need things to distract us and release the energy being pent-up……

Today we were suppose to make Banana Nut Muffins with chocolate chips but after much hype and gaining the little ladies full attention we happened to be missing at least three ingredients. And yes, there were tears, “Mommy can’t we just make muffins without eggs?”, “Mommy can’t we just wait for the eggs?”….Not even the promise of Daddy picking up eggs and muffins being made first thing in the morning would do 😦

As I sat struggling with my 3-year-old, pleading with her to understand, I had an amazing idea…An idea like no one has ever had before!… OK, maybe that’s not so true, but I felt clever for remembering I had other options..which is hard to do these days. I suggested homemade play dough and BINGO, we had a winner!

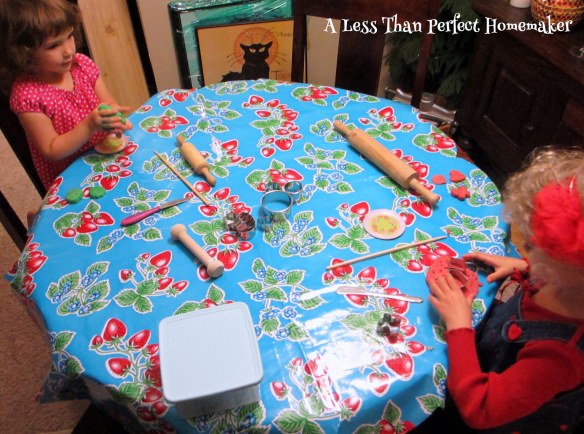
So the girls and I found some fun on this rainy day and made Homemade Play Dough!

Homemade Play Dough Recipe

Ingredients:

  • 1 Cup flour
  • 1/2 cup salt
  • 2 Tablespoons cream of tartar
  • 1 Tablespoon of oil
  • 1 Cup water
  • food coloring
  • food flavoring (optional)

Gather your ingredients.

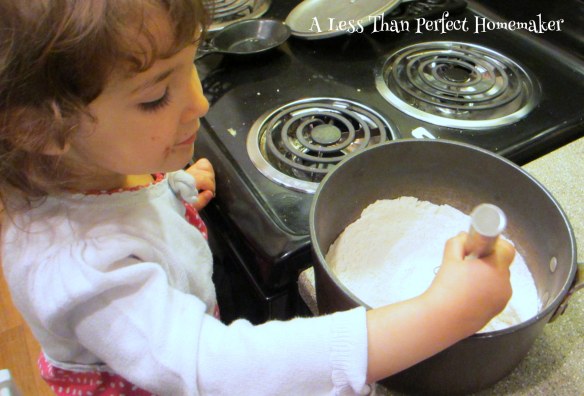
Procure help, preferably from littles.

Make your dough!

  1. Mix dry ingredients in a medium saucepan
  2. Add oil and stir
  3. Add water and stir over medium heat. continue to stir until dough starts to pull away from sides and is becoming difficult to move. You may scrape dough out of corners of pan.
  4. Turn dough out on a non-stick surface (we use an oilcloth tablecloth) and knead until dough feels like “play-doh”. Homemade play dough does tend to be slightly softer in texture than store-bought however.

Add color and scent to your dough.

  1. separate dough into balls (however many colors you choose to have)
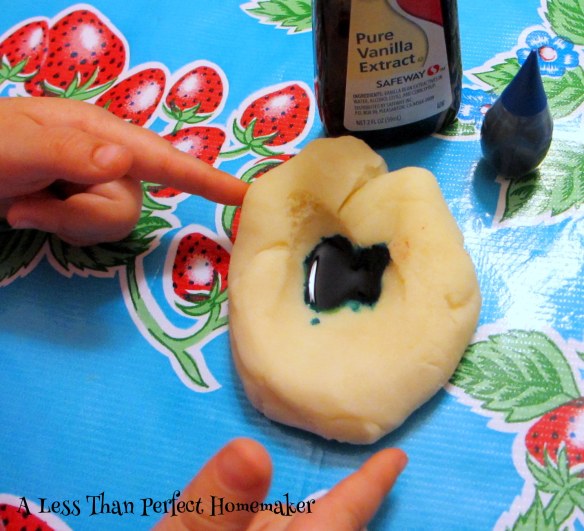
  2. create a dip in the dough ball. Add food coloring a few drops at a time along with a few drops of flavoring (We used vanilla, raspberry, and orange)
  3. Knead coloring into dough. Continue step 2. until dough is desired color and smell 🙂

Don’t worry if you do not completely spread the color out evenly, it will do so as your children play with it 🙂 You do want to make sure there are no wet spots of food coloring before handing it over, or you might have a mess on your hands!

*Note* This is the most important step.

Have fun with your play dough!

 Some alterations to the method:

  • You may add coloring and scent to the cooking process which is honestly easier but you will only have that one color.  All the more reason to make more batches!
  • Be creative with the dough, use Koolaid for color and scent, use cinnamon for scent, add glitter, pick up fun food colors from cake decorating stores! Your only limited by your own imagination!

Happy Playing

Samantha

Electrical Wire Spool Patio Table

As I mentioned in an early post DIY Compost Bin I had picked up an electrical wire spool off of the corner in front of the electric company while perusing for wood pallets. At the time I didn’t have any idea what I would use it for but it seemed too cool not to bring home. I’m not even sure I was permitted to take it but it was such a site to see me hoisting this thing on the back of my truck that anyone watching just let me be.

My husband gave me quite the odd look when I pulled up in front of the house with it sitting in back of the truck….I think he was nervous about some sort of underlying pack rat gene….. 

As soon as he helped me with it off of the truck we decided together that it was to become our patio table! It even already has a hole in the center for my sun umbrella….It gets hot in this California Sun! *note* acquire sun umbrella 😉

This look really appeals to me, ever since I was little I would collect broken items and imagine what their story was or rummage around abandoned properties seeing the potential for something amazing.

Now! Don’t go thinking I just hoard tons of unusual things…..I learned better than that from watching my father. But I do like to keep a few things around here and there that will someday be something beautiful, whether my husband actually believes I’ll turn them into that or not!!

Electrical Wire Spool Patio Table

I picked up a couple of pairs of bar stools to complete the look and as you can see they have since then been seasoned from the weather. Perfect ♥ I was thinking about eventually making a top out of fence boards to extend out a little but I don’t know…I’m a little attached to the holes and rusty bolts. What do you think?? I still do need to finish it in some way because it catches your clothing while you’re trying to eat 😛

Seats four perfectly!

Have a happy day!

♥♥♥

Samantha

Up-cycled Wood Pallets DIY Compost Bin

A Very Cost Effective Way to Start Your Compost Bin

My first year of gardening I had no compost bin, however my backyard had so many random piles of compost that I didn’t much need one. The following year I decided I might need one but I had no funds to buy a pre-made one nor materials to build my own.

So day after day I searched the web pining over compost bins….Bins made of wood, bins made of metal, bins that turned. I couldn’t afford any of them 😦

Aren’t they Pretty??

Finally! While reading through one of my organic gardening books i forget which one, lets just pretend i came up with this idea on my own? A came across the idea to make one out of wood pallets. Genius!

I was off! Do you remember spiriting them away from behind grocery stores? When I was younger, my friends and I all did for bonfires so I thought easy enough. Yeah right! not so easy anymore..haha. Apparently everyone sends them back these days..who would of thought? Eventually after driving all over town I managed to scrape together four wood pallets of similar design and a bonus electrical spool which now acts as my patio table *I’ll post photos of that eventually*.

Once I brought the pallets home, unloaded them, and decided where to place the compost bin, it was quick work to set up 🙂

Wood Pallet Compost Bin

The front comes off for easy turning.

Front removed for easy turning.

If you want to copy this most clever idea, you will need:

  • 4 wood pallets, all about the same in design
  • zip ties or rope

place your pallets upright and secure the sides together with heavy-duty zip ties or rope tied tightly at all corners!

~viola~

Your done 🙂

And just for fun, here is a picture of a much prettier wood pallet compost bin.

Have Fun!

♥♥♥

Samantha


Homemade Easter Egg Dying

So I have been sick for like a month! seriously…a month 😦 Easter just kinda jumped right out at me and I haven’t done a single thing to prepare. So no decorating, no crafting, no Easter egg dying, and not to mention I have a slew of guests showing up for Easter brunch and egg hunt.

Finally today (the day before) I felt well enough to make it into town to pick up my provisions for the Holiday. I managed to remember everything but the egg dying kit so I quickly found one on the internet and I thought I would share it with you lovely folks.

 ~*just in case you were under weather too*~

Honestly I think the homemade dye produced much more vibrant results than the tabs you get in a kit! 🙂

Here is the Recipe for homemade Easter egg dye:

Homemade Easter Egg Dye

Ingredients:

  • ½ cup boiling water
  • 1 teaspoon white vinegar
  • 10 drops food coloring
  • 1 tablespoon olive oil (optional)

Directions:

  1. For each dye bath combine boiling water, vinegar, and food coloring drops. For color other than your basic, combine colors from the color wheel to make new ones ie. 5 red drops and 5 blue drops for purple and so forth.
  2. Dip your hard-boiled eggs in preferred color and let sit for 3-5 minutes. For really vibrant color leave even longer.
  3. Us tongs or a slotted spoon to remove your dyed eggs and place back into the carton or onto waxed paper, news paper, or a paper bag (whatever you have handy)
  4. For tie dyed eggs. Use the optional olive oil in your dye recipe. After the eggs have sat in the dye for a period remove them with slotted spoon and wipe away the access oil. Then place them in a second color. Ta Da! you should now have tie dyed eggs!

So There you have it 🙂 Super easy to do and you most likely already have all the ingredients in your pantry.

ingredients

Mixing my ingredients

I could have definitely gotten way more creative with all of this egg dying stuff but…I figured the kids are all so young and my patience is not exactly grand so I kept it simple.

The little ladies and myself

Sarah's husband and son

The kids showing off their handy work ♥

If you wanted to use glitter or stickers that would be great. You would just need to coat your egg with craft glue and sprinkle glitter on. When using stickers you could put them on before hand and peel off when done or let the eggs dry and put them on afterwards. Also you can draw pictures with a white crayon which is what we did. It will show through when you dye your eggs. Super Fun! 🙂

Finished eggs

Happy Easter!

♥♥♥♥

Samantha